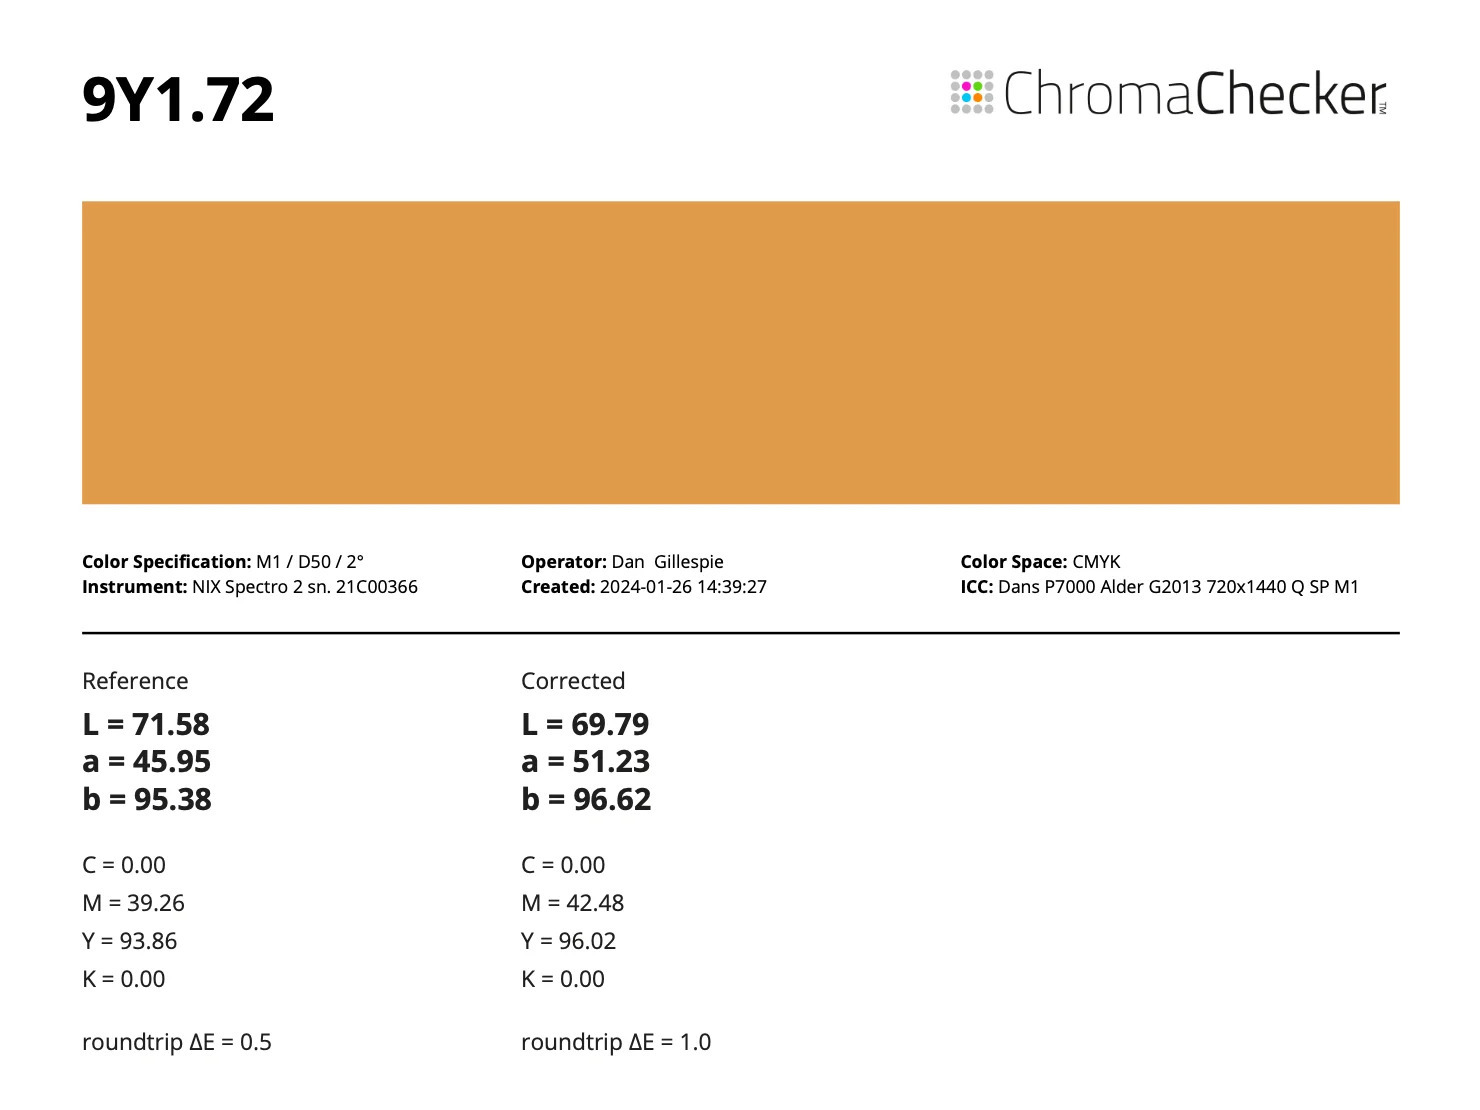
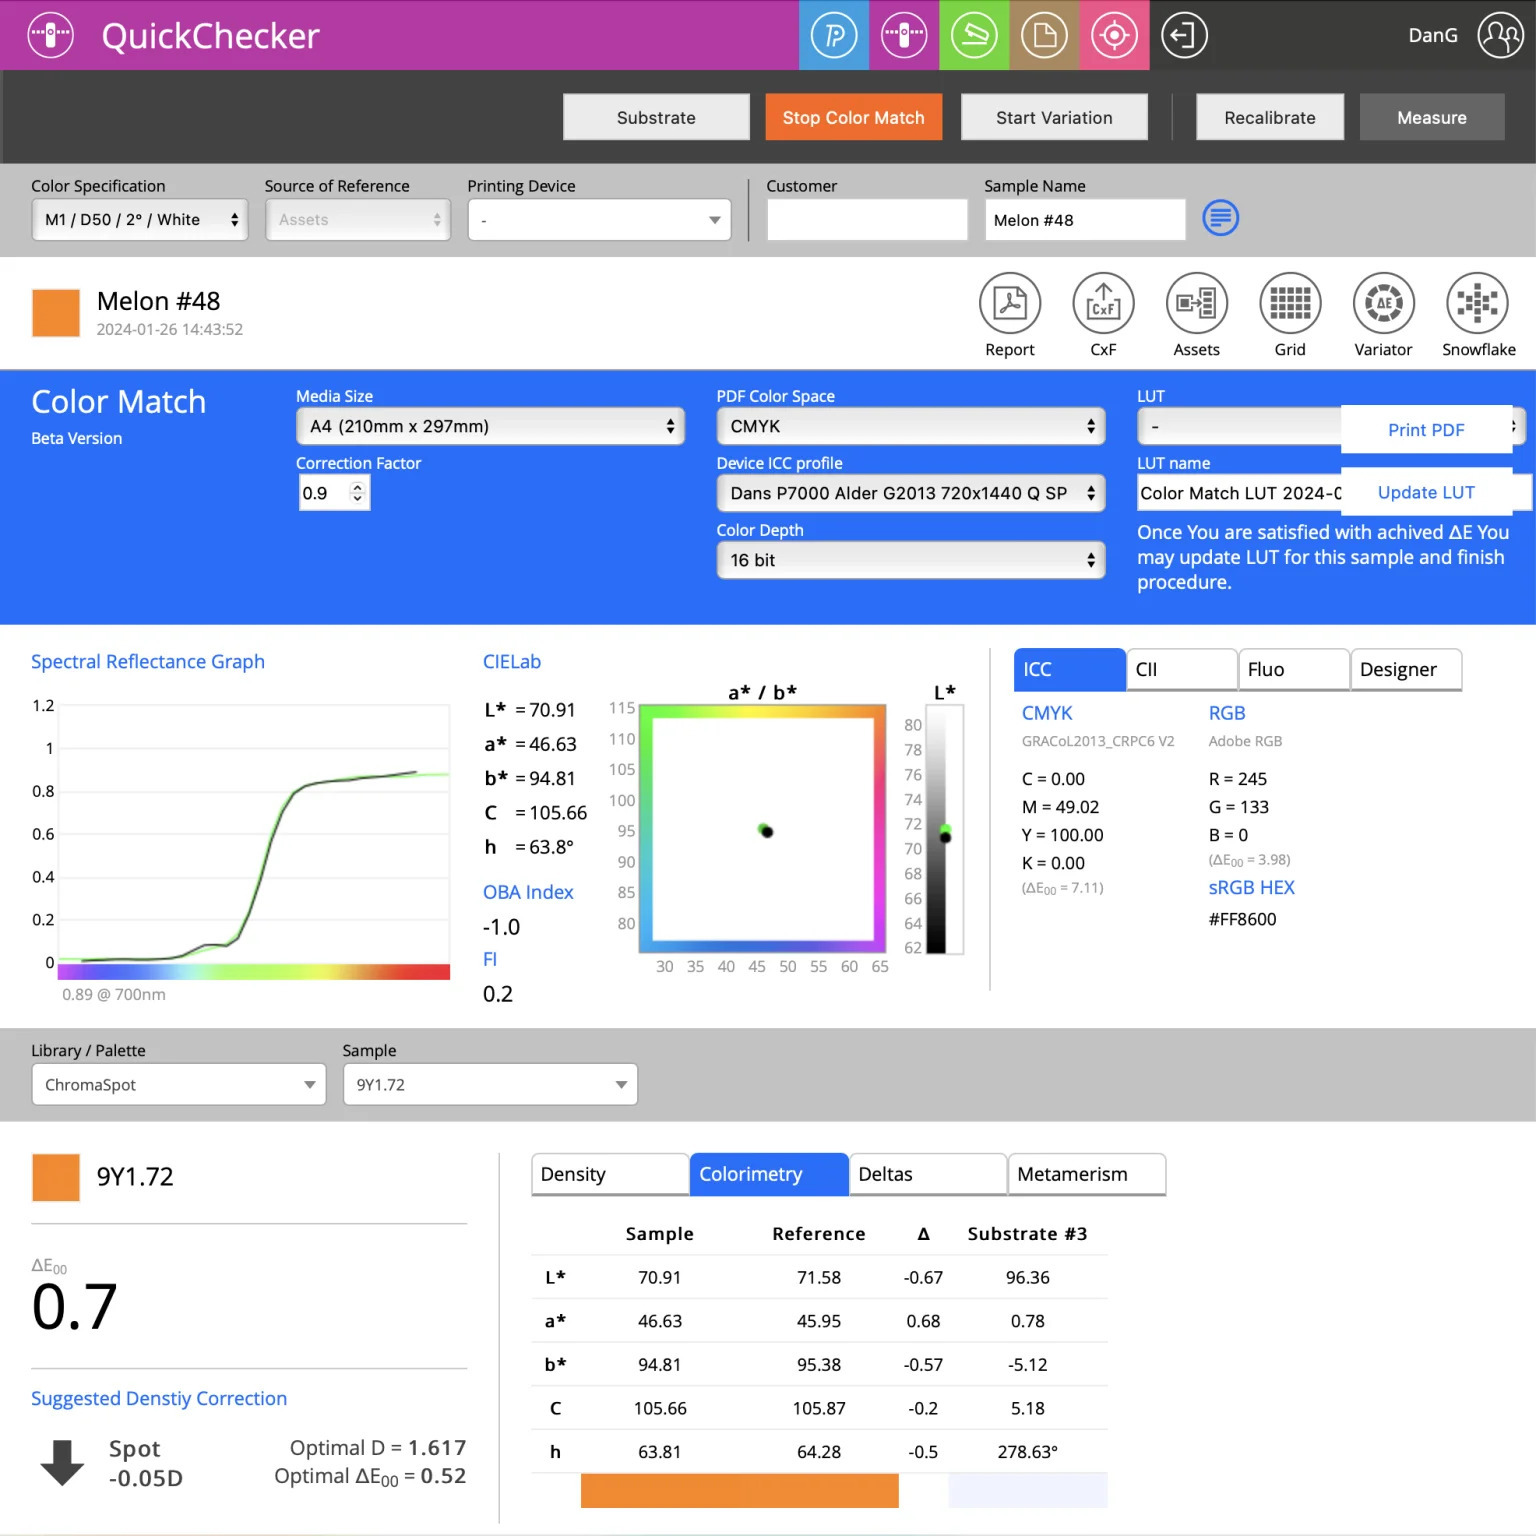
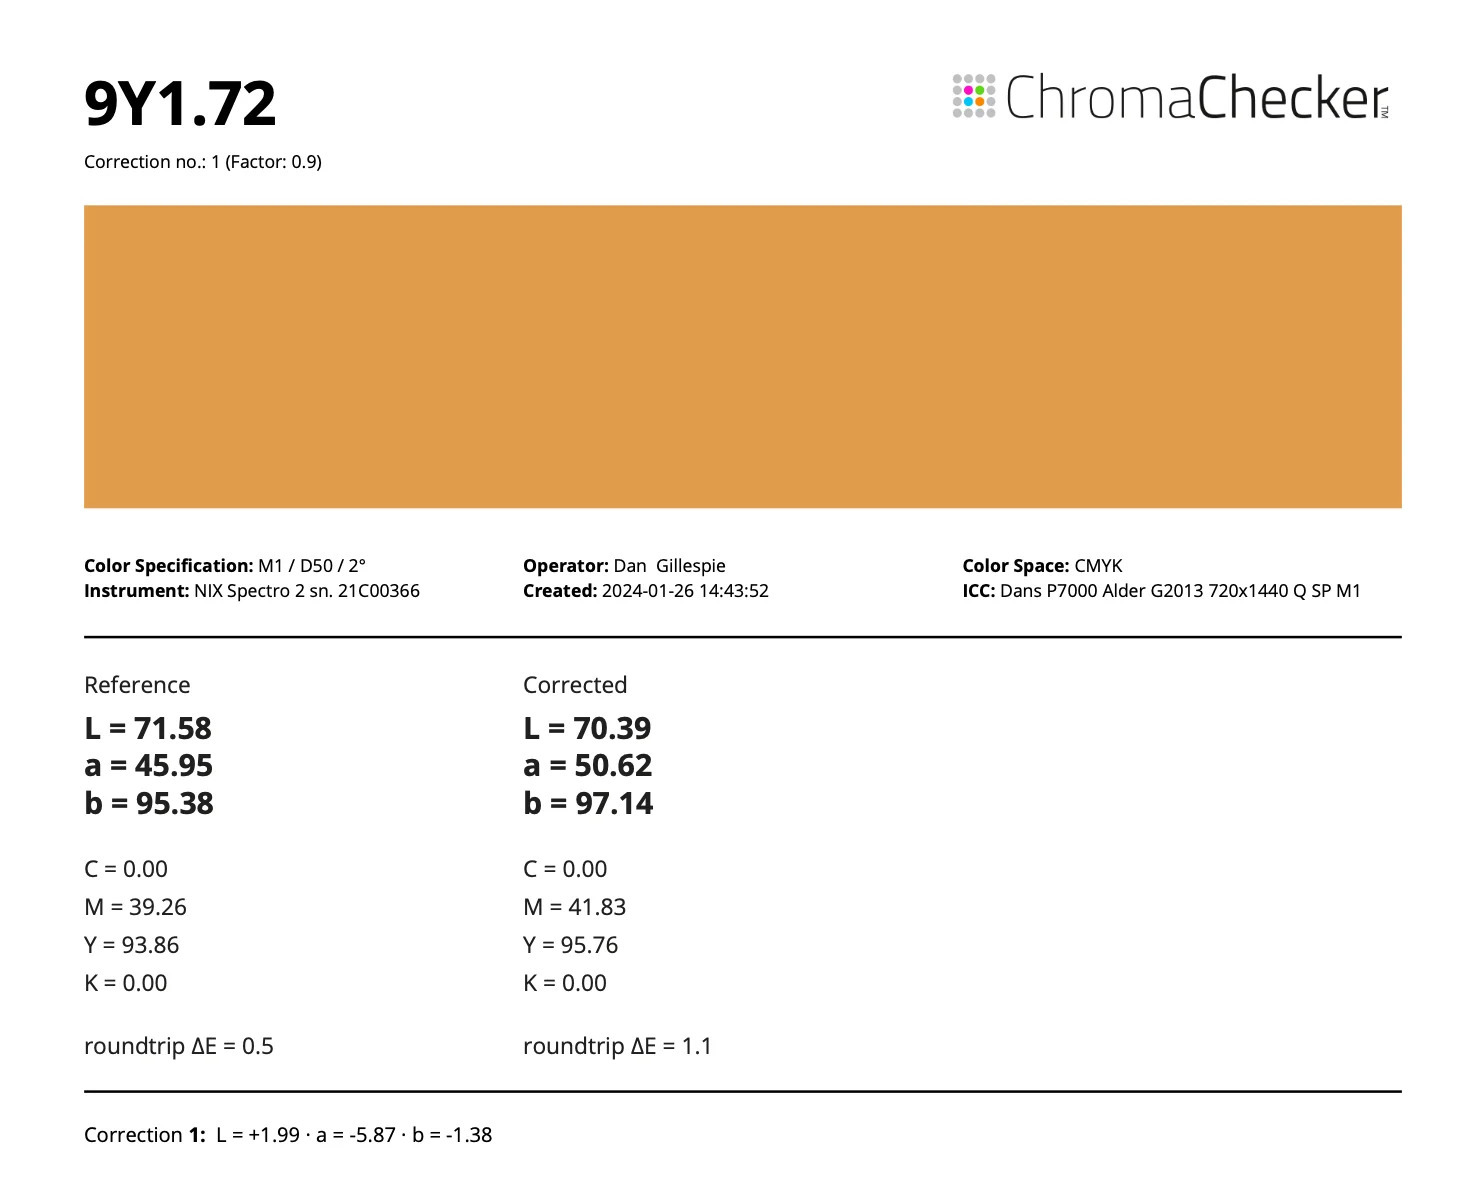
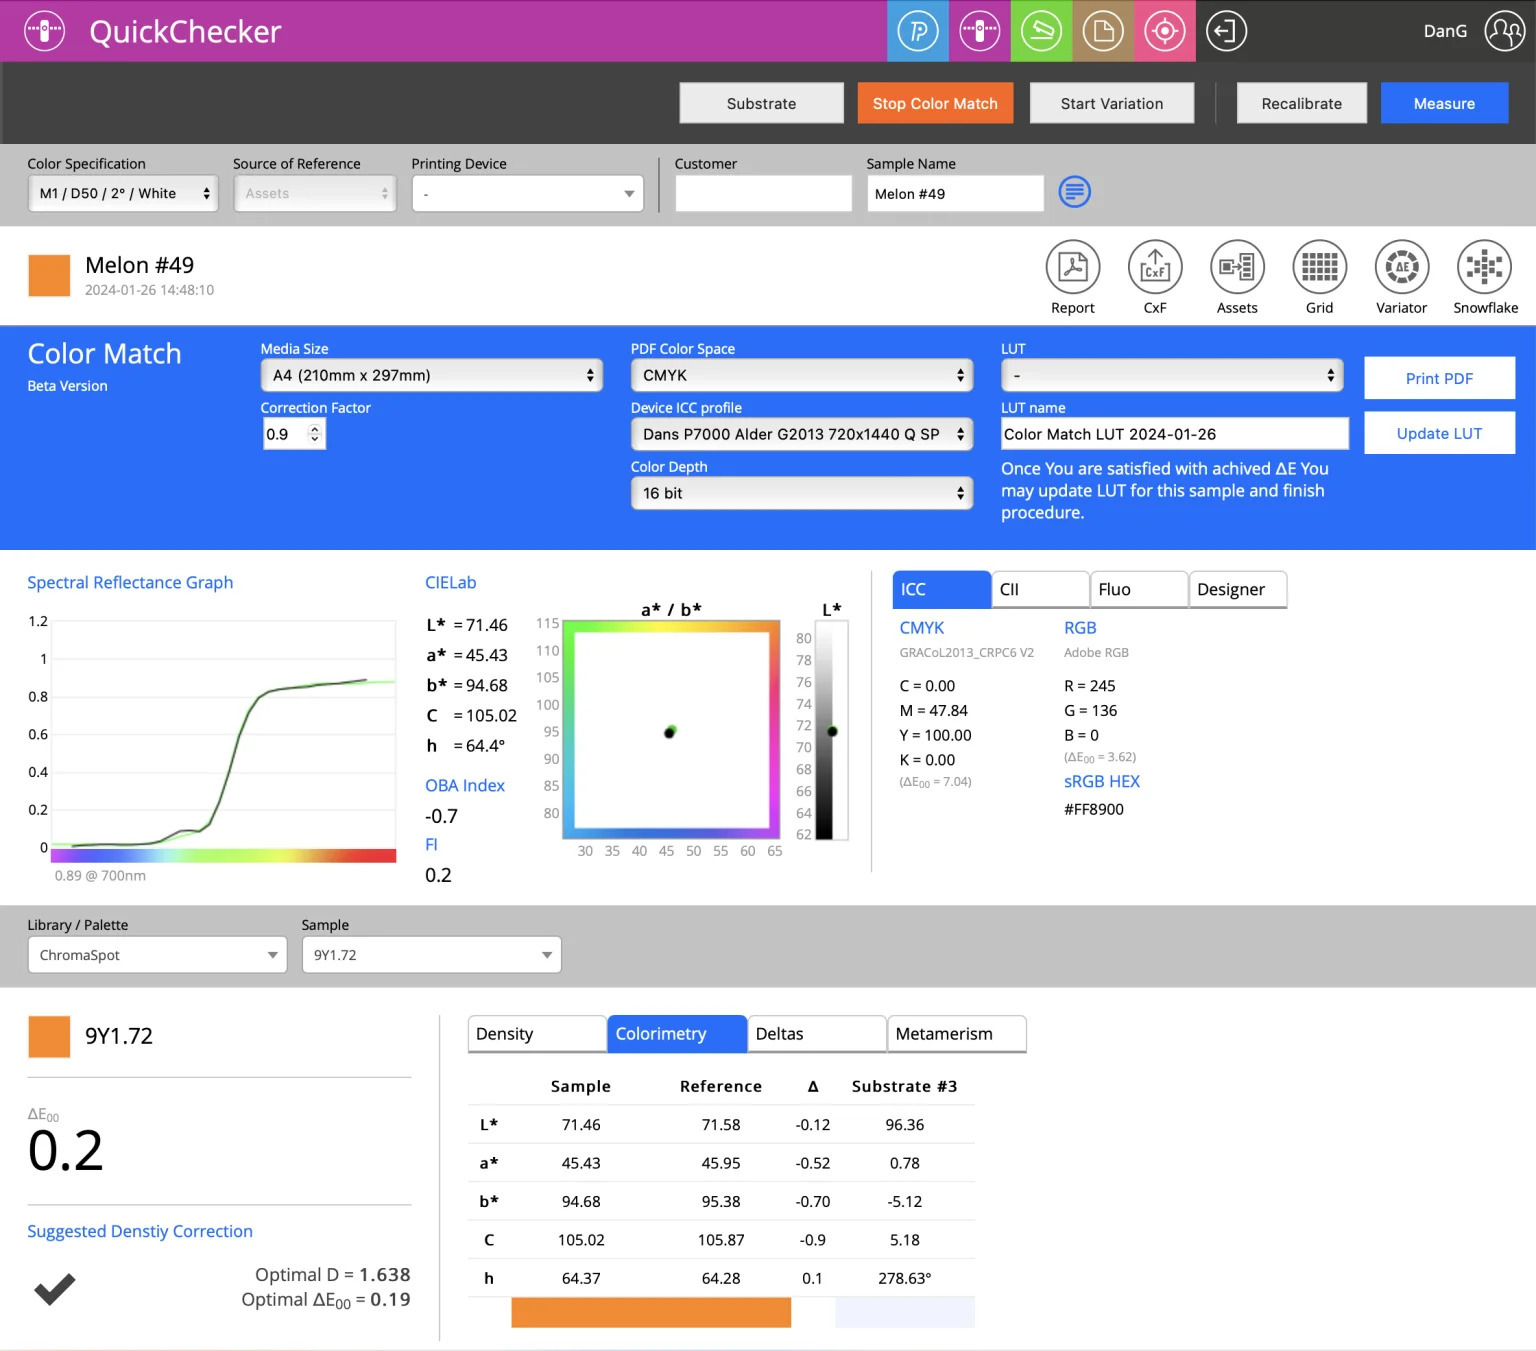
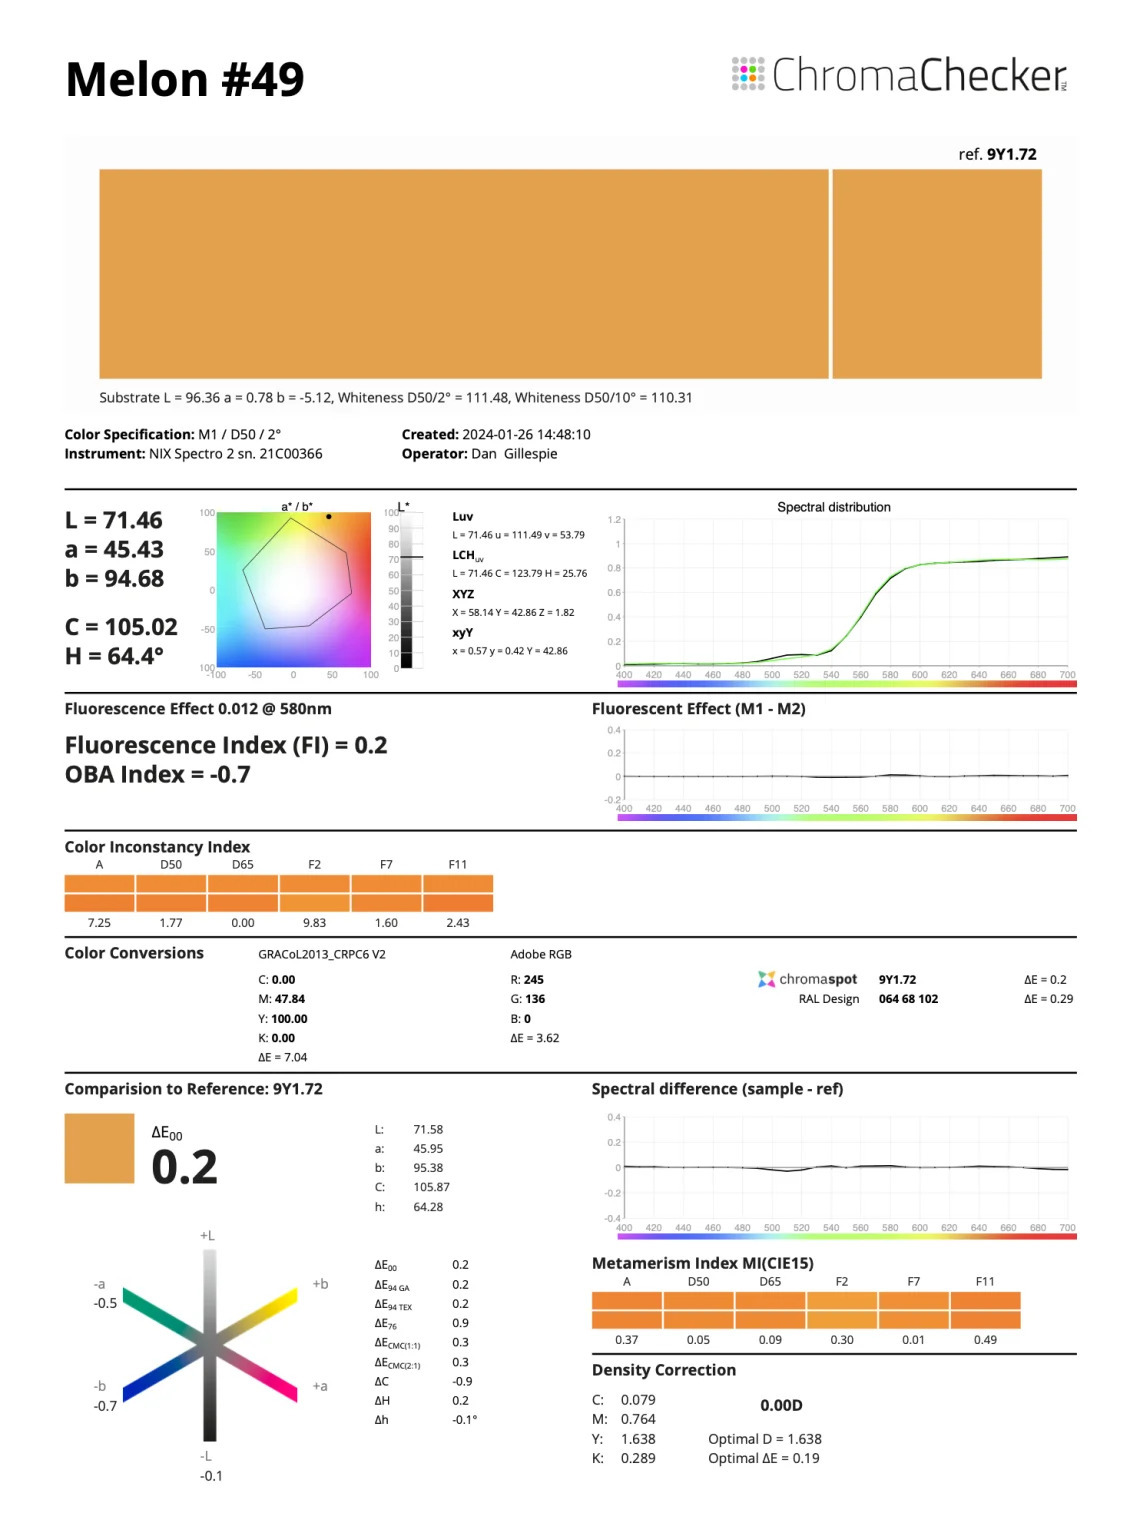
The new Color Match functionality in ChromaChecker Capture works so well it's almost hard to believe — accurate, quick, and genuinely easy. In this walkthrough, I'll take you through it step by step. Launch Capture v3 and choose QuickChecker across the top. Once in QuickChecker, click the Substrate button, place your spectrophotometer on the paper you want to simulate, and click Measure. One rule that applies to every measurement in this process: always measure over a white backer. Click Start Color Match. By default the Source of Reference at the top is set to Assets, which gives you access to any of the palettes and libraries stored in your Color Inspector in the cloud. From the Palette/Library dropdown in the lower section, choose your color library, then type in the name of the color you're matching. In my example, I chose the ChromaSpot Library and typed the color name 9Y1.72. Set the PDF Color Space to CMYK and choose your Device ICC Profile. (You can upload ICC profiles through the dashboard so they appear here.) Click Print PDF, then print it. Important: Turn color management off in the RIP, so it prints CMYK at full gamut. Measure the printed swatch by clicking Measure (again, over a white backer). You'll now see a comparison between the original target values and the values measured from your printer. In my example, we started 3.0 ΔE 2000 off. The Colorimetry tab shows exactly how it's off — by 1.99 L*, −5.87 a*, and −1.38 b*. That's the kind of detail that turns "it looks wrong" into "here's precisely what to correct." Click Print PDF again — this time the correction values are applied. Print, return to Capture, and measure again. The second PDF shows corrected L*a*b* and CMYK values, and a huge improvement — from a 3.0 ΔE match down to 0.7. That's good enough for just about anyone. But if you want to push it further, click Print PDF once more. The third PDF carries further correction values, and in my example it went from 0.7 to 0.2 ΔE. It doesn't get much better than that — and the whole thing took about five minutes. Once you're happy with the result, click Update LUT to save the correction, then click Stop Color Match. You've now saved the exact L*a*b* and CMYK values to reproduce that color as closely as possible. Here's what I love about it: this takes zero expertise. Someone color blind could do it — it's all math and color science, with nothing subjective in the loop. For a full record, click Report. Choose CMYK for the PDF Color Space again, select your Device ICC Profile, then choose the LUT you just saved to apply the correction. Click Download. Keep it for your records or print it as a visual reference. For more about the platform, visit the Alder Color Control Platform page. Want to try it? Register for a free trial. Any questions, reach us at info@aldertech.com. Director of Technical Services, Alder Color Solutions Dan has spent more than three decades helping printers, converters, publishers, packaging companies, and photographers get control of their color — across offset, flexo, wide-format, digital, and packaging production. He founded the color consultancy ColorGeek Inc. in 1999 and joined Alder in 2018. A certified G7 Expert since the inaugural 2006 class, he has spent nearly twenty years implementing G7 and international print standards in real production environments, and was one of the few certified instructors for the SGIA Digital Color Professional program. He's also a professional photographer — which keeps him fluent in both the artistic and technical sides of imaging.1. Measure Your Substrate
2. Pick the Color to Match
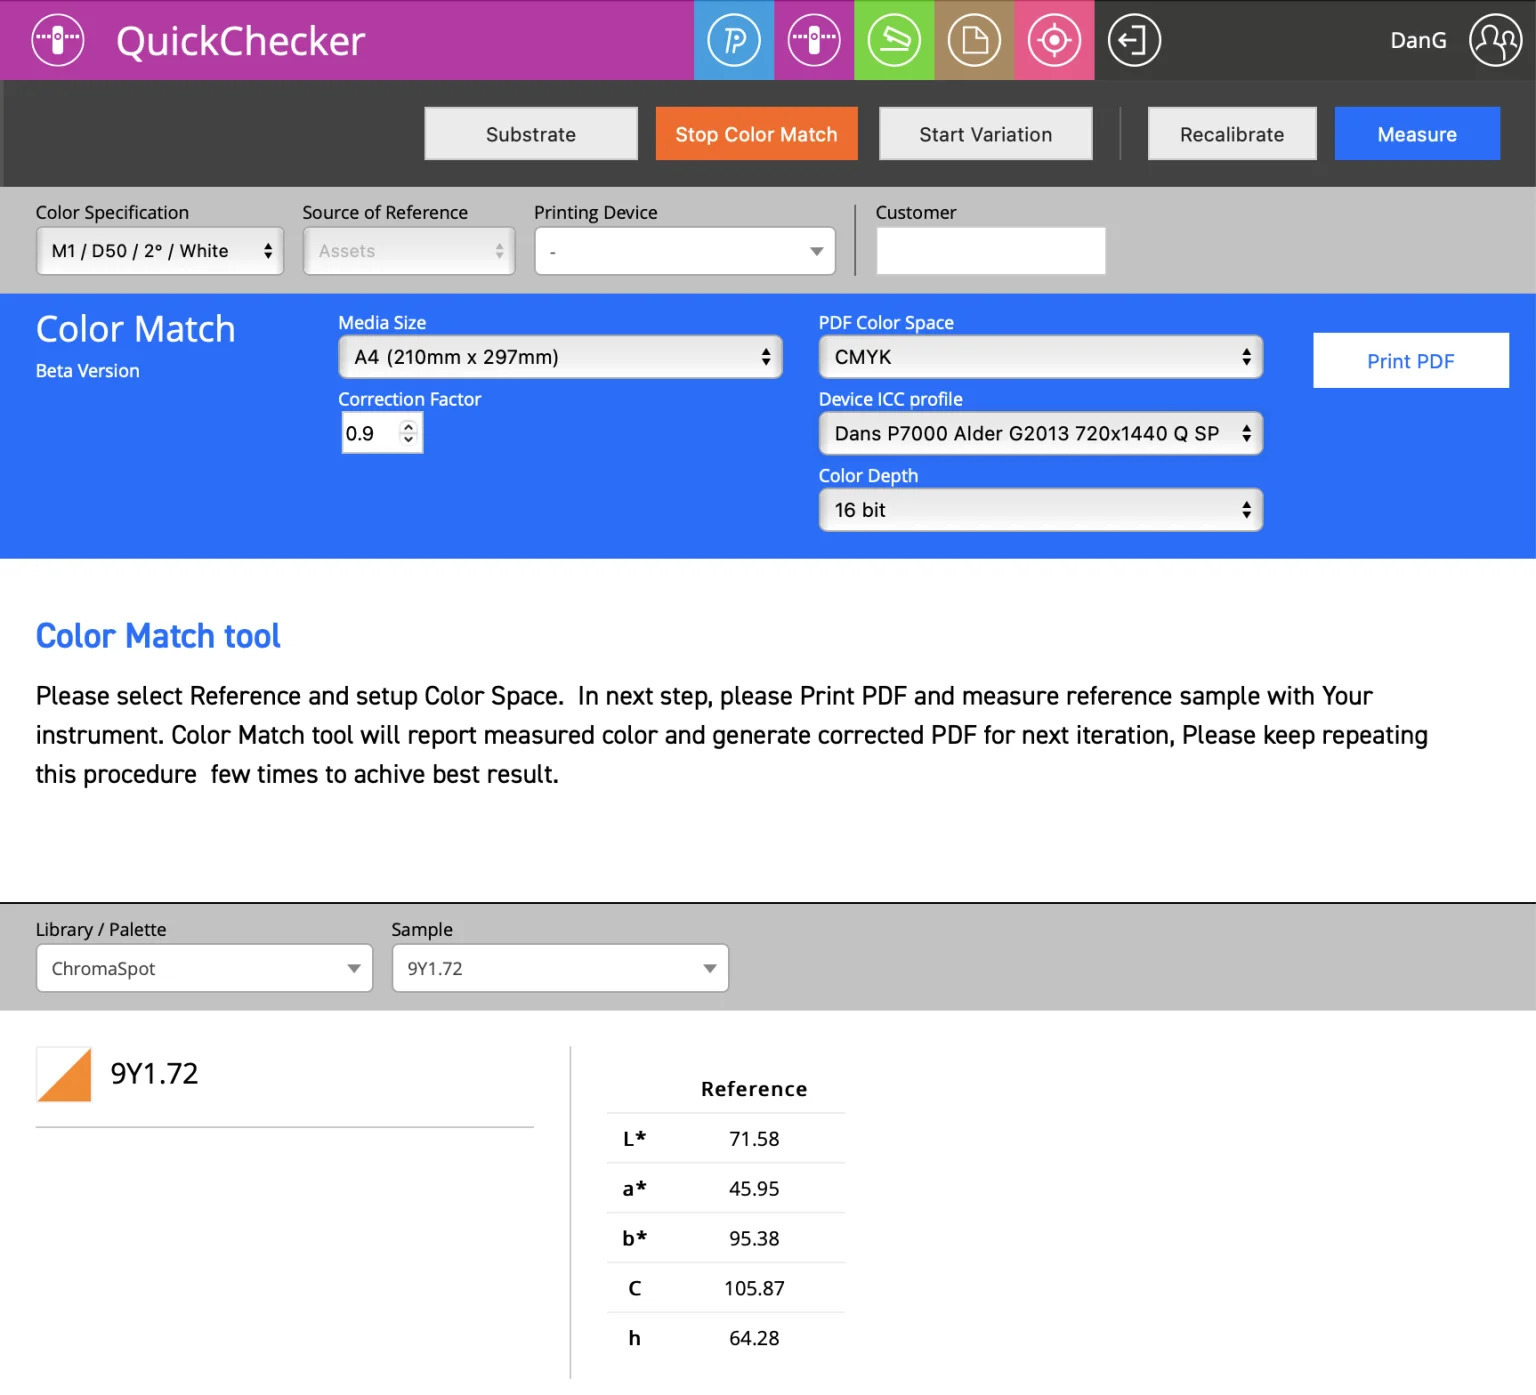
3. Print and Measure the First PDF
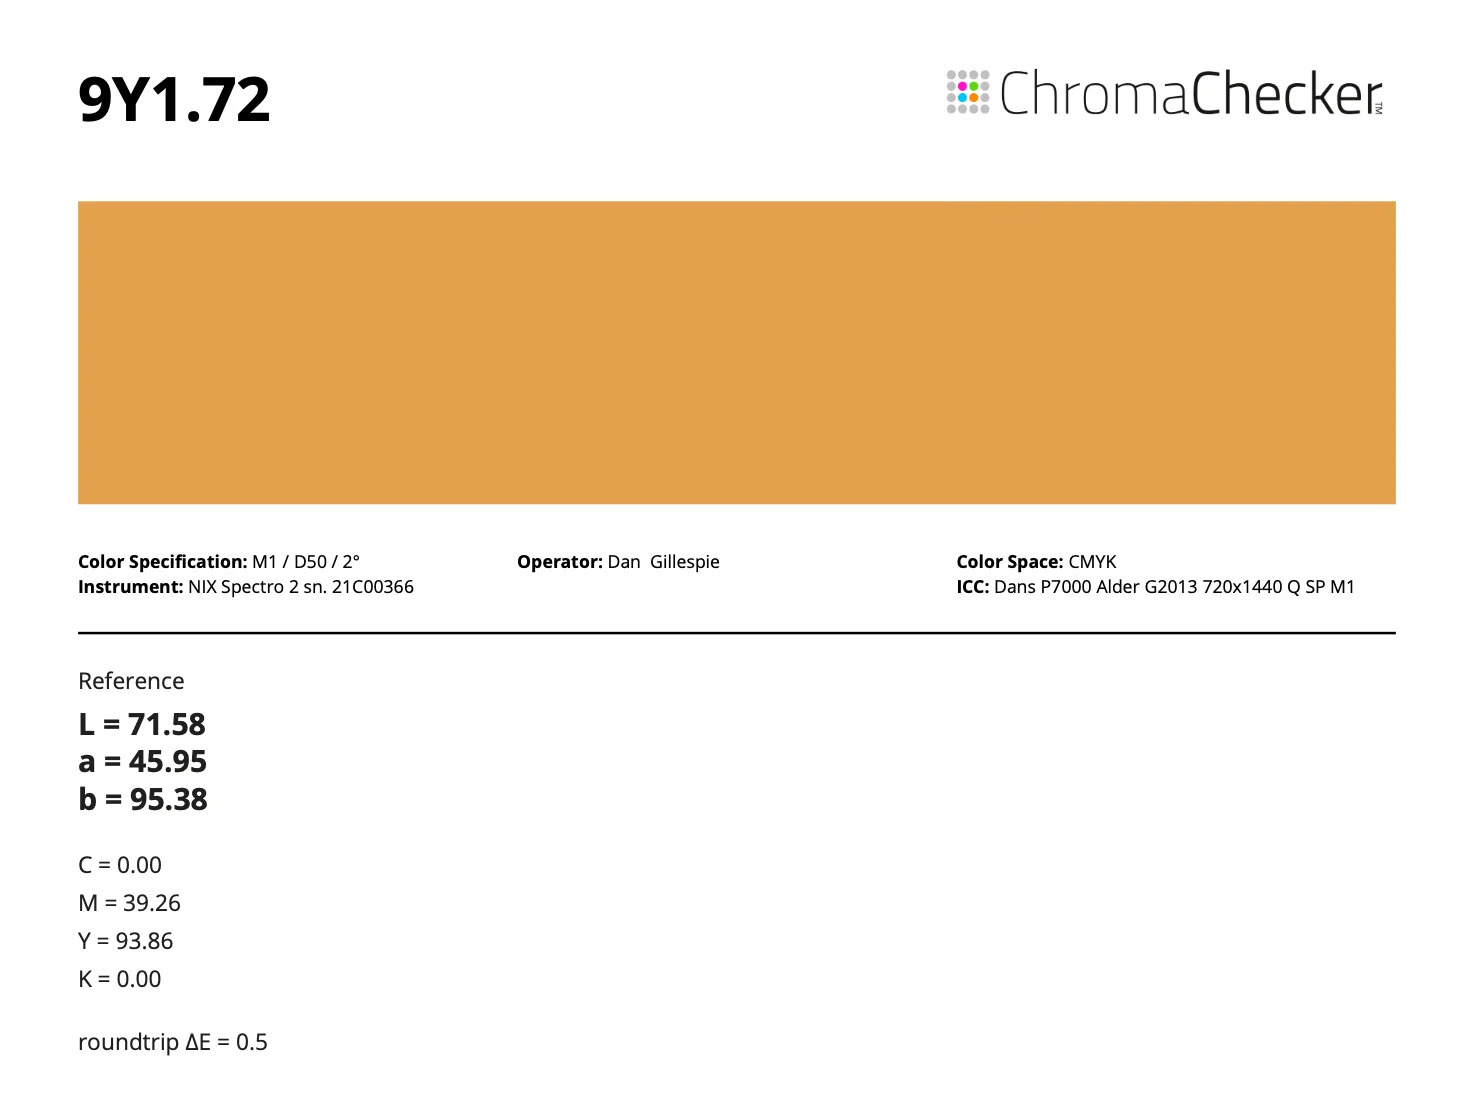
4. Iterate: 3.0 → 0.7 → 0.2 ΔE
Pass
Result
1st PDF
3.0 ΔE 2000
2nd PDF (correction applied)
0.7 ΔE 2000
3rd PDF (further correction)
0.2 ΔE 2000
5. Save the LUT
6. Generate a Report
Try It Yourself
About the Author

Dan Gillespie