Every RIP/DFE has a source profile and an output profile specified for color conversions. Here's the problem most people never notice: the default source profile is, in most cases, smaller than the gamut of the printing device — which means it's holding back color that could have been printed. In this article I'll show how to set up what I call "trick" workflows using Wide Gamut CMYK profiles to unlock that color. Standard ICC practice in desktop applications and RIP/DFE settings is to honor embedded ICC profiles. So if I'm a photographer (which I am) or a designer (which I also am), I prepare my work in a specific RGB or CMYK color space — Adobe Creative Cloud defaults to sRGB and US Web Coated (SWOP) — and if you honor the profiles I embed, I'll get what I was shooting for. The trouble is, those default choices aren't ideal. As a color management consultant I understand this, but the vast majority of people don't. Most don't realize they're choosing a container of pixels that's smaller than what most printers can actually produce. And we can't reach out to every one of them to teach them how to prepare their files correctly. But here's what we can do: not honor their embedded profiles, and instead choose the profile we want to assume as the source. I call these "trick" workflows because you tell the software the file is coming from a color space it was actually not prepared in — because the space it was prepared in isn't ideal for using all the color the printer is capable of. In the example below, I converted the evaluation images from RGB to CMYK in Photoshop the way most people would — Edit > Mode > CMYK. With default color settings, that converts everything into US Web Coated (SWOP) v2 (the lower-right image). Then, to illustrate the concept, I assigned three different wide gamut profiles — ChromaChecker_WideGamut, PrintWide2020 (Idealliance), and RolandWideGamut — to show what happens in a RIP when each is used as the source/input profile. First, the gamuts themselves. These four profiles are different shapes and sizes — which is exactly why they produce different results. Look closely at the images above. The lower right is the default CMYK conversion — what you'd get if you honored embedded profiles. The other three show what you'd get by intentionally assuming the "wrong" source profile. You can clearly see the wide gamut CMYK profiles produce different results because of their differing shapes and sizes: You can use these wide gamut ICC profiles as your default CMYK Working Space in Adobe CC applications by choosing one under Edit > Color Settings. I'm not suggesting you use this "trick" workflow for every job. But when you want to maximize the color output from a file that wasn't created optimally, it's a fantastic option that can produce impressive results. Try it yourself: duplicate one of your existing workflows, change the source profile to a Wide Gamut CMYK profile, turn off "honor embedded profiles," and… BAM. (If you don't have access to these profiles, you may need to download and install them first.) Feel free to contact me with questions. Director of Technical Services, Alder Color Solutions Dan has spent more than three decades helping printers, converters, publishers, packaging companies, and photographers get control of their color — across offset, flexo, wide-format, digital, and packaging production. He founded the color consultancy ColorGeek Inc. in 1999 and joined Alder in 2018. A certified G7 Expert since the inaugural 2006 class, he has spent nearly twenty years implementing G7 and international print standards in real production environments, and was one of the few certified instructors for the SGIA Digital Color Professional program. He's also a professional photographer — which keeps him fluent in both the artistic and technical sides of imaging.The Problem With Honoring Embedded Profiles
What a "Trick" Workflow Actually Does
The Example: Four Profiles Compared
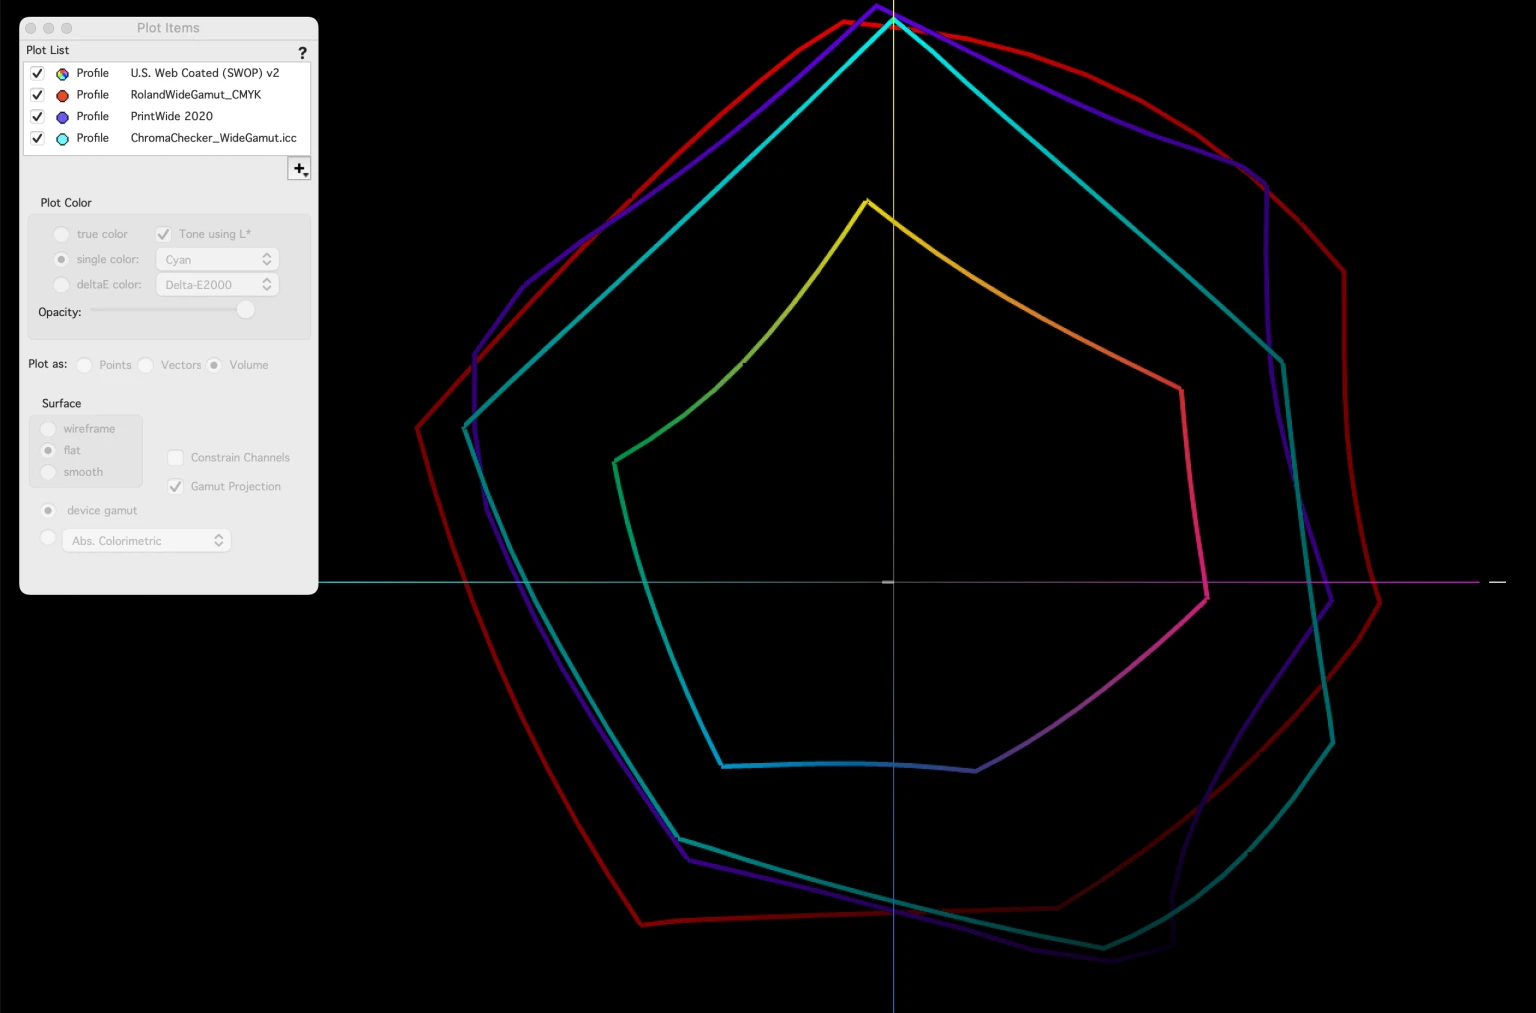
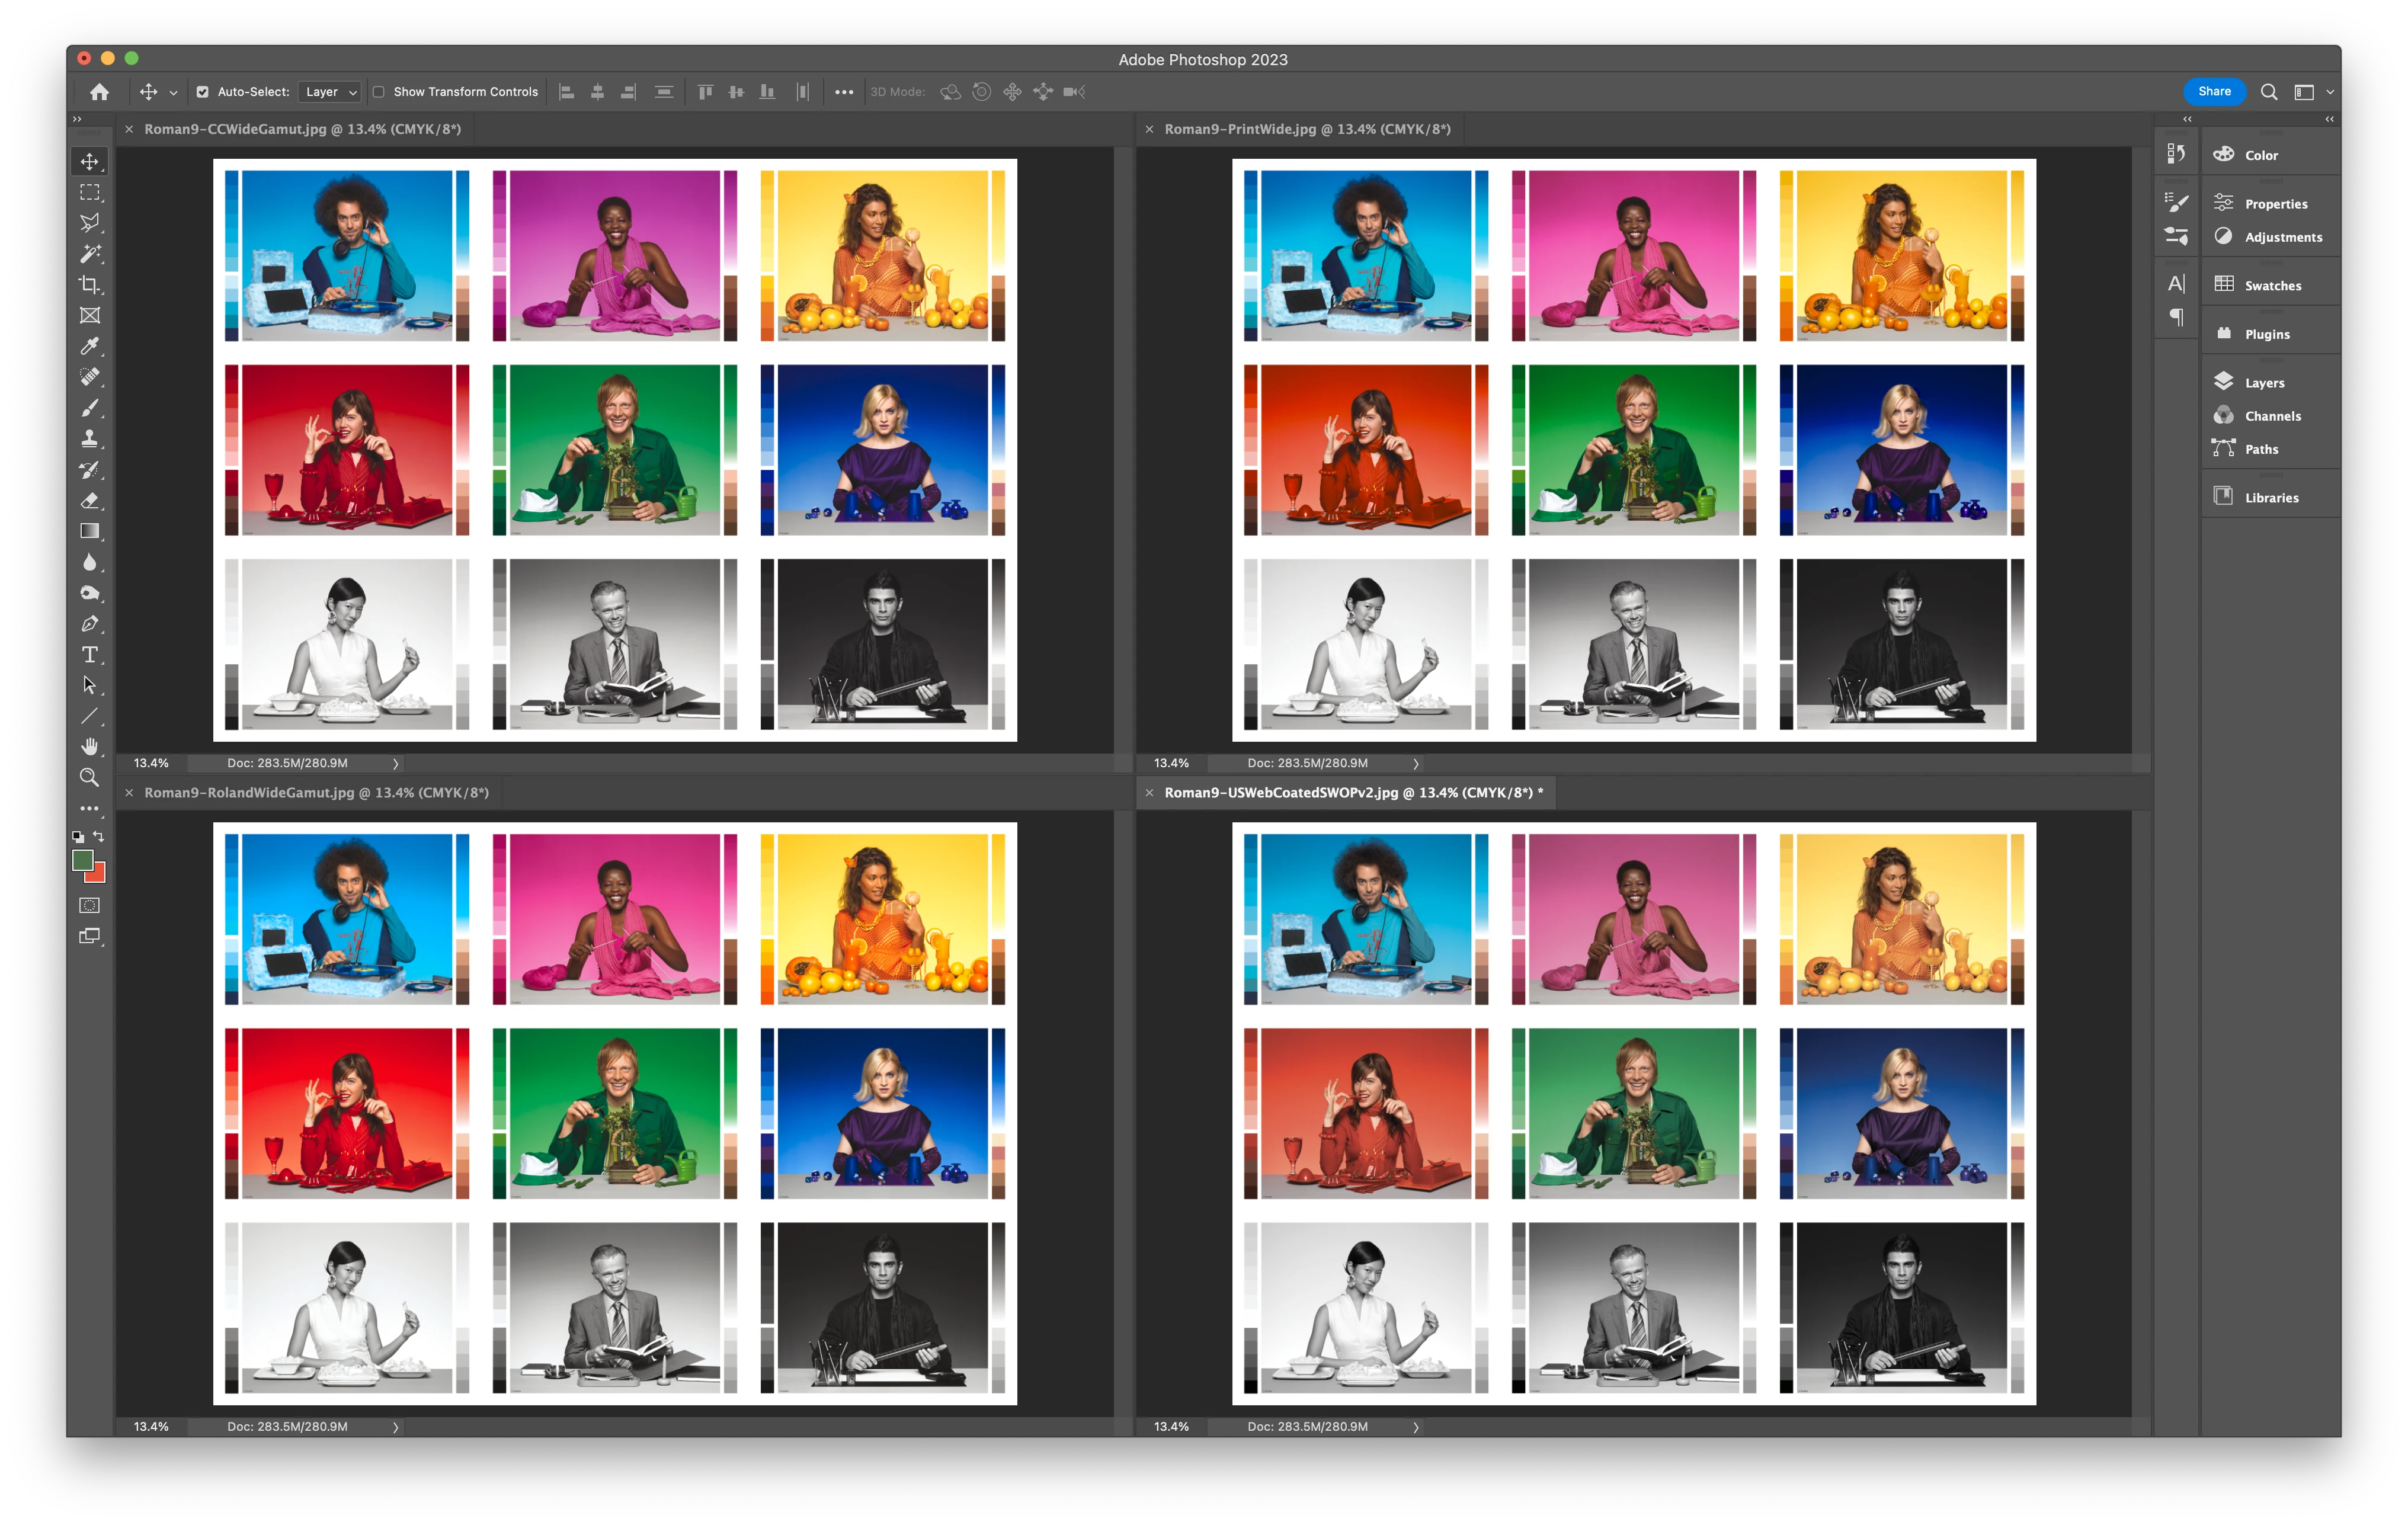
Reading the Results
A Note for Designers
When to Use This
Questions?
dang@aldertech.comAbout the Author

Dan Gillespie